I Made it Monday
Join
me on my ongoing quest to share tips, tricks, projects, and recipes along with
just about anything else on I Made it Monday.
Removable Throw Pillow Covers
I
have wanted to make throw pillows for my couch for ages. I made some Christmas
pillows a long, long time ago with polyfil stuffing but I wasn’t very happy
with their durability. The polyfil clumped and the pillows collapsed over time. The truth
is, I don’t just want one set of throw pillows. I want throw pillows for every
holiday and every season. I want to change them out regularly but also have
some that “belong there” when it isn’t a holiday or I’m not decorating for a
season. The problem with this is that terrible phrase that so many of us
struggle with … where will I store them? Seriously, if I have 3 or 4 pillows
for every holiday, season or celebration I’m going to need a closet just for
pillows. Considering that I already need a closet just for fabric, and could
use one just for other craft supplies, means a dedicated pillow closet really isn’t in my
cards. That’s where today’s project comes in. I’ve decided to make removable
covers so I can switch them out whenever I want, they won’t take more than a
small bit of shelf space to store and they have an added bonus: they can be washed whenever needed.
Supplies
- Pillow forms. I got mine at IKEA for $3.99 each.
- 1 ½ yards of 54” home décor fabric of choice to make 2 twenty inch square pillow covers.
- Basic sewing supplies, machine, needle, thread, scissors, iron, ruler, you know, the basics.
Measure
pillows. Mine were labeled 20” x 20” but they were really more like 19 ½” x 19
½”.
Determine
your width and length and cut your fabric. I suggest using the same width measurement as your
pillow. I know what you’re thinking, “There’s no seam allowance. It won’t fit.”
But it will. It will fit snug and your pillow will look full and plump, not
half empty and limp. For the length you are going to double the length of the
pillow and add 8”. For me this means my fabric will need to be 19 ½” x 47” (19
½ + 19 ½ + 8).
 |
| It may be easier to cut your fabric by folding it in half. Just take a few minutes to be certain of the orientation of the fabric when cutting it. |
Now
you should have a rectangle of fabric. On the short ends you will need to fold
over 3/8”, iron, then fold it over itself, and iron it again. After you have
ironed both ends go ahead and sew the seam down on each end.
 |
| I sewed the seam somewhat close to the edge. |
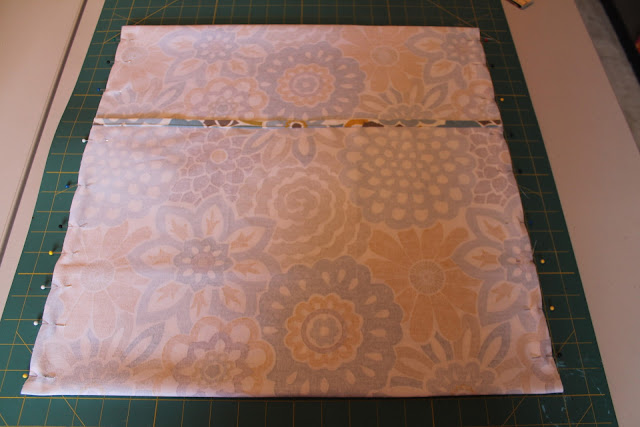
With
your fabric right side up, lay it out on a flat surface. I found the center of
the long length and folded each short end over so that they overlapped
somewhere around 3 inches left or right of center respectively. I then adjusted each end until the sides were 19 ½”
just like my top and bottom, trying to keep the overlaps relatively even in
relation to the middle. Once you have your sides adjusted, pin them together, then sew the seams.
 |
| Overlap the ends and adjust until the sides (shown on the top and bottom in this pic) are the correct length. |
 |
| Try to keep the overlap relatively even. You can tell that mine is a little longer on one side but not too much. I did say relatively. |
 |
| Pin the sides then sew. |
Trim the corners of your seams to allow for easy turning, then turn the pillow cover right side out. I like to use the tip of a small paint brush to push out the corners. Iron your pillow cover then stuff your pillow form inside and fluff. That’s it. You’re finished!
 |
| Trim your corners. |
 |
| Give it a quick iron then stuff your pillow form inside. |
 |
| This is what the back of the pillow looks like. |
Have
you made pillow covers another way? Be sure to share in the comments and when
you give these a try I would love to see pics.
 |
| Here's a great comparison of how different the couch looks with the new pillows. |
Be sure to follow me on Pinterest, as well as Facebook, and find my designs at Applique Time. Check back next week to see my next I Made it Monday
post.
Regards,
Bridgette


No comments:
Post a Comment