Supplies:
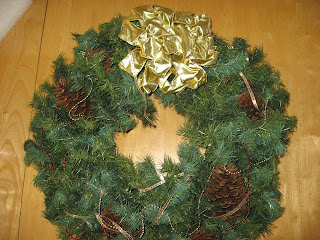
a wreath (like I said, this one has been around a while)
sheet of Styrofoam (I purchased mine at Joann's. It was about an inch thick and probably 11x14)
marker
knife
newspaper
30 gauge wire (or whatever you have around the house as long as it isn't too thick)
glitter (I bought an 8oz bottle and almost used 1/4 of it)
spray paint the same color as the glitter
clear drying school glue (I used almost 2 4oz bottles)
a paint brush (the wider the better)
a bowl to pour the glue into
ribbon or something to hang the wreath
I knew what I wanted my letter "W" to look like. Being an applique person I am very familiar with lots of fonts especially the curlz font. I really wanted something with a little whimsy but clear enough to be distinguishable from the road. Using the marker I drew my "W" on my Styrofoam. (Did you know Styrofoam is a brand? Kinda like Q-tip.) I wasn't worried about getting it perfect because it would be covered anyway. If you're having trouble picturing your letter just head to your computer and look at a few fonts online.
Next I went outside and cut the letter out using a knife. I found it easiest to score it first and then go back and cut through.
I cut 4 long pieces of wire. I wanted them long enough to wedge into the Styrofoam and have plenty of length to tie the finished letter to the wreath. I just kinda cut the wire into the foam on each end. Kinda like it was cutting into it but not through it. Just wedged in there. I guess I should have tried a little harder to get a pic of this because describing it isn't coming so easy.
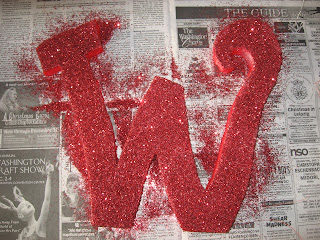
After that I went outside to spray paint my "W" red. I wanted to do this so in the event that I wasn't generous with my glitter the white wouldn't show through. The wire did come in handy tying the letter to the volleyball net tie down. If you look really close and are younger than 40 you might be able to see the wire "wedged" in there.
 |
| This picture brought to you by the letter W. |
After the paint dried next came the glitter. I poured the glue into a small bowl to make it easier to use the paint brush. I brushed some glue on then generously applied the glitter and just worked my way around a little glue and a lot of glitter at a time. This took a while because I had to wait for sections to dry so I could turn it around to get to other spots like the sides and top. I really had to resist the urge to move on while the glue was drying.
I don't know if it was because I was liberal with the glitter or because of the spray paint but 1 coat of glitter was plenty. The next morning I did apply a second layer of glue over the glitter. I wanted the top coat to be glue not glitter and since I was using school glue that dried clear this was no problem. (You may be able to see the wire here also as well as a complimentary viewing of the Arts section of the Washington Post.)
After waiting most of the day for the glue to dry I was able to use the attached wire and secure my 12 inch "W" to my wreath that evening and hang it up on the front door. I am very pleased with the appearance both up close and far away. I have to admit, there was a time early on in the glittering that I was worried that it might look a little thrown together but once I got a nice layer of glitter on it and put it together I'm very happy with the outcome.
How about you? Do you have a great wreath makeover to share?


Wonderful wreath makeover! Beautiful :-) Funny that we have a similar wreath that has been around since I purchased it in Corpus Christi, I won't even say how long ago that was. It had a gold bow and gold ornaments at one time, it also participated as a costume in a school play in second grade....I'm sure you were there too.....and now it has more of a natural look with some grapevine and also redish berries in place of the gold.
ReplyDelete