
I Made it Monday
Join me on my ongoing quest to share tips, tricks, projects, and recipes along with just about anything else on I Made it Monday.
*This post may contain affiliate links, which means I receive a small percentage if you make a purchase using the link. For my full disclosure statement please click here.

*This post may contain affiliate links, which means I receive a small percentage if you make a purchase using the link. For my full disclosure statement please click here.

How to Make a Cleaning Schedule that Works for You
*** Author's note *** This post was very difficult for me to write. Not that I couldn't get the basic concept of a cleaning schedule down but to convey that you have to do what is right for you and your needs. Don't be intimidated. My schedule is that of a stay at home Mom with two grown children and a 9 year old. My needs are different. Take suggestions and samples but make something that works for you. And don't worry, it doesn't have to be as pretty as some that you've seen online, or cute, or neat, or comprehensive. Find what works for you, not someone else. This is definitely one of the categories where something is better than nothing.***
I know you've seen them on Pinterest. Beautiful checklists of cleaning schedules and routines and tips and tricks all aimed to help you find a rhythm and keep your house spotless. Well, I've got something to tell you. They. Don't. Work. Not that they don't work at all, but not for you. Here's why. Those schedules were all made for someone else. Their home, their children, their work schedules, them and just them. No one else. But you really need a schedule to help you stay on track you say? Yeah, me too. So I made my own and you can also.
Before we go on ... I don't know about you, but the cute graphics and bright colors on some of the printable checklists online do nothing to motivate me to clean a toilet. It doesn't matter what shape you put next to it for me to put a check mark in, I'm just not going to be excited about the job. If you need cute graphics and rainbow colored check boxes this may not work for you either. Just wanted you to know.
Several years ago I had a revelation. Although many of the families living around me had some type of home cleaning service, they generally only came once every two weeks. This meant the toilets and bathtubs and anything else of my neighbors was only being cleaned once every two weeks. If they could get by on a two week schedule why couldn't I? It's not that I was cleaning everything weekly, or even biweekly, but as a stay at home Mom the pressure was there, even if it was only in my head. When I actually started to break things down to a biweekly schedule it all seemed plausible. I didn't have to clean everything on the same day, but if I could say that it had been cleaned in the last two weeks, well, that was good enough for me. And if I had a bad day and missed something, that was okay too, because it would come back around in two short weeks.
Here's how I did it.
First, I made a list of each presumed weekly chore in my house.
Next, I made a list of things that I considered maintenance. These are things that don't have to be done regularly but it helps to do them occasionally during the year.
Hope's room - My youngest daughter is a shover. She shoves everything in little cracks and crevices in her room. Books that go on the book shelf get shoved into stacks. Papers that go in her desk get shoved in the drawers. She picks up but she's just at that stage where if you let it get out of hand it takes an entire weekend and several trash bags to deal with. I prefer to spend a few minutes with her every other week dealing with some element of her room. This week could be her bookshelf, next time might be her nightstand. We don't "clean" her room, we just deal with a few things. If you have kids older than 4 you probably understand.
Cards - This really isn't a household chore but more of a social chore that just wasn't being handled well before I put it on the schedule. I make a list of the upcoming events that might require a greeting card. Mostly birthdays (that I was constantly missing before) but also things like Mother's Day, graduations, weddings, births, etc, and I go shopping for all of the cards that I will need for the next 6 months all at once. This has made this task a lot easier to keep up with. And if you're thinking why don't I just email cards I will tell you. To me, there is nothing like opening the mail box and finding a brightly colored envelope with a card inside. Emails get deleted. Snail mail cards are saved. I am all for cutting the clutter but I do like a nice greeting card.
Washer drain - I have a front load washer with a drain filter hidden on the front. According to the manufacturer this filter should be cleaned bi-monthly. It's really pretty easy and effective. I've found some strange things in the trap (think bobby pins and the like) that surely would have started to cause a problem over time.
Paint Touchups - I prefer to deal with furniture scuffs and marks on the painted walls inside and outside of my house on a regular basis rather than ignoring them and letting them collectively diminish the appearance of my home. Sounds snooty. Makes me happy. That's all that matters.
Doorknobs and light switches - No, I don't clean them every month, but I do try to spray them with Lysol or some other disinfecting spray monthly, or even more often if a family member has been sick. In fact, if someone has been sick, I am likely to also spray the remote controls, backs of chairs, sink faucets, cabinet knobs, refrigerator handle, and really anywhere else germ ridden hands typically touch.
I think that's it. I hope that you can find inspiration to make a schedule that is right for you. If you have suggestions for how you've been able to make it all work please feel free to share in the comments.
For a PDF version of my schedule click on the image of my schedule. For an editable Excel version click here.
I know you've seen them on Pinterest. Beautiful checklists of cleaning schedules and routines and tips and tricks all aimed to help you find a rhythm and keep your house spotless. Well, I've got something to tell you. They. Don't. Work. Not that they don't work at all, but not for you. Here's why. Those schedules were all made for someone else. Their home, their children, their work schedules, them and just them. No one else. But you really need a schedule to help you stay on track you say? Yeah, me too. So I made my own and you can also.
Before we go on ... I don't know about you, but the cute graphics and bright colors on some of the printable checklists online do nothing to motivate me to clean a toilet. It doesn't matter what shape you put next to it for me to put a check mark in, I'm just not going to be excited about the job. If you need cute graphics and rainbow colored check boxes this may not work for you either. Just wanted you to know.
Several years ago I had a revelation. Although many of the families living around me had some type of home cleaning service, they generally only came once every two weeks. This meant the toilets and bathtubs and anything else of my neighbors was only being cleaned once every two weeks. If they could get by on a two week schedule why couldn't I? It's not that I was cleaning everything weekly, or even biweekly, but as a stay at home Mom the pressure was there, even if it was only in my head. When I actually started to break things down to a biweekly schedule it all seemed plausible. I didn't have to clean everything on the same day, but if I could say that it had been cleaned in the last two weeks, well, that was good enough for me. And if I had a bad day and missed something, that was okay too, because it would come back around in two short weeks.
Here's how I did it.
First, I made a list of each presumed weekly chore in my house.
- Bathrooms
- Dusting
- Vacuuming
- Kitchen
- You get the idea.
- Oven
- Dust hanging picture frames
- Vacuum/sweep under furniture
- Clean out dryer vent
Then, I sat down with a piece of paper and thought about my family's schedule. Which days were busier than others? Some days we had after school commitments. Some days I volunteered at the school for 3 or 4 hours at a time. Some days there just wasn't a moment to spare with all of the homework and driving around, others there was enough flex that I could actually think about accomplishing more than just running the dishwasher.
I divided the chores among a two week schedule breaking up large tasks, like cleaning everything in the bathroom except the bathtubs one week, and just the bathtubs the next, or cleaning the upstairs floors one day and the downstairs floors another. It didn't have to all be done at once, just once every two weeks. When I was finished with the presumed weekly chores I moved on to monthly maintenance chores dividing them among the months of the year, taking into consideration our families likely activities and the weather. For example, cleaning the oven was scheduled for January since running the super hot cleaning cycle on the oven would help warm the house not over heat it like it would in July or August. And August didn't get any big tasks because back to school time is hectic enough. Here's my recently revised schedule for our new house.
 |
Click the here to download a PDF version. An excel link is located at the bottom of the post. |
This is where I want you to stop for a moment and not focus on the schedule as it is written. This is my schedule. It works for me. It's not yours. In order for this to work you're going to have to make your own schedule, or at the very least, tweak mine some. My schedule is really meant to be a guide.
Some things to know. My kids are older. I don't have little ones crawling or playing on the floor all day so floors are not a high priority. If you have little ones you'll probably want to clean the floors more often, at least in some rooms, so your schedule will be different. I am a bit of a neat freak when it comes to the kitchen. I want the counters cleaned, the appliances sparkling and the dishes in place. If a more "lived in" kitchen is your style then you have a little extra flex. And believe me, sometimes I really wish I could be okay with that too. My laundry demands may be less than yours as well. I don't wash my middle daughter's clothes (she's 18 and does her own laundry), I have a daughter away at college so I don't do hers either, and we live in central Florida now so we're rarely wearing much more than shorts and t-shirts.
Don't do more work than you have to. I have cleaning products and paper towels under the sink in every bathroom so I don't have to gather my supplies when it's time to clean. This also helps for little clean ups in between. When I had little kids I kept them nearby on a high shelf in the linen closet. Also, I don't use a lot of different products. Pine-sol mixed with water to make pine cleaner works great on counters, straight Pine-sol in the toilet, glass cleaner for the mirror and a Mr.Clean Magic Eraser Bath Scrubber for the tub are all I need for the bathrooms. I even use Pine-sol and water to mop. Other than my laundry supplies I don't use much else for cleaning.
If you're looking at my schedule you might notice that the more straightforward things, like making the bed or emptying the dishwasher, aren't there. My schedule was never meant to be a daily checklist for me but more of a guide. Making the bed, general tidying, and emptying the dishwasher are things that happen no matter what's on the list. I iron almost every day, too.
I also understand that a few things on my list might take a little explaining.
Laundry - No, I don't do all of my laundry on Monday. I do however make a plan. Not a written plan, and certainly not a non-flexible plan, but a plan. If I know that we have 3 softball games like this week I try to anticipate the laundry so I can wash my daughter's softball uniform with a full load of laundry and not find myself needing to wash it alone. I try to wash at least 1 load each day during the week. I find that if I start more than 1 load then that's all that I do, start it, but not finish it. If I do 1 load I am likely to wash, dry, fold and put it away. When it's not a sport season my laundry schedule typically looks something like this ...
Monday - Darks
Tuesday - Lights
Wednesday - Towels
Thursday - Bath and kitchen rugs (this is on the schedule).
Friday - Bed laundry (this is on the schedule).
If I need to do more, say there are lots of darks, I try to do another load on towel or rug days since those are easier loads and it's at least possible that I will complete the extra load and not leave it stalled in one stage or another of the laundry process.
And a little clarification on bed laundry. I rotate whose bed gets washed each week. Currently we have 3 beds being used in our house so we could go as much as 3 weeks between washings. Yes, I have extra sheets, but of course I prefer those that are on the beds, so I typically don't change them unless I am washing them and putting them back on. Go ahead. Judge me. If laundry is light one week I may pull another set and wash it, if not, I am perfectly fine going 3 weeks. I know someone, somewhere says that you should wash your sheets every week, but you should serve something besides hot dogs or cereal for dinner too. Priorities. If cleaning/changing your sheets is more important put it on your schedule more often.
Cook - I like to do my own pseudo version of monthly freezer cooking. I don't prepare everything for the month but I do buy in bulk and prepare in bulk. Some weeks I bake, then freeze a lot; muffins, apple bars, granola bars. Other weeks I prep and freeze for dinners; shredded chicken, browned ground beef, diced onions, meatloaf, ziti, hamburgers. Basically whatever I stocked up on while shopping gets prepped or cooked on Tuesday of week one.
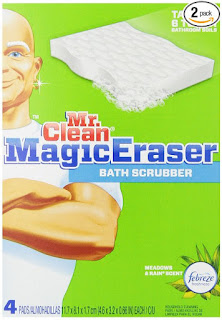
Bathtubs - By accident we bought Mr.Clean Magic Erasers Bath Scrubbers. I admit, I was a little frustrated to begin with since I didn't mean to buy them, then I used one and it is
a-maz-ing. I had been using dryer sheets to clean the soap scum in my shower. The Magic Eraser Bath Scrubber did the job in half the time with half the effort. They are worth their weight in gold. If you haven't tried them now is your chance.
Hope's room - My youngest daughter is a shover. She shoves everything in little cracks and crevices in her room. Books that go on the book shelf get shoved into stacks. Papers that go in her desk get shoved in the drawers. She picks up but she's just at that stage where if you let it get out of hand it takes an entire weekend and several trash bags to deal with. I prefer to spend a few minutes with her every other week dealing with some element of her room. This week could be her bookshelf, next time might be her nightstand. We don't "clean" her room, we just deal with a few things. If you have kids older than 4 you probably understand.
Cards - This really isn't a household chore but more of a social chore that just wasn't being handled well before I put it on the schedule. I make a list of the upcoming events that might require a greeting card. Mostly birthdays (that I was constantly missing before) but also things like Mother's Day, graduations, weddings, births, etc, and I go shopping for all of the cards that I will need for the next 6 months all at once. This has made this task a lot easier to keep up with. And if you're thinking why don't I just email cards I will tell you. To me, there is nothing like opening the mail box and finding a brightly colored envelope with a card inside. Emails get deleted. Snail mail cards are saved. I am all for cutting the clutter but I do like a nice greeting card.
Washer drain - I have a front load washer with a drain filter hidden on the front. According to the manufacturer this filter should be cleaned bi-monthly. It's really pretty easy and effective. I've found some strange things in the trap (think bobby pins and the like) that surely would have started to cause a problem over time.
Paint Touchups - I prefer to deal with furniture scuffs and marks on the painted walls inside and outside of my house on a regular basis rather than ignoring them and letting them collectively diminish the appearance of my home. Sounds snooty. Makes me happy. That's all that matters.
Doorknobs and light switches - No, I don't clean them every month, but I do try to spray them with Lysol or some other disinfecting spray monthly, or even more often if a family member has been sick. In fact, if someone has been sick, I am likely to also spray the remote controls, backs of chairs, sink faucets, cabinet knobs, refrigerator handle, and really anywhere else germ ridden hands typically touch.
I think that's it. I hope that you can find inspiration to make a schedule that is right for you. If you have suggestions for how you've been able to make it all work please feel free to share in the comments.
For a PDF version of my schedule click on the image of my schedule. For an editable Excel version click here.
Be sure to follow me on Pinterest, as well as Facebook, and find my designs at Applique Time. Check back next week to see my next I Made it Monday post.
Regards,
Bridgette


