Showing posts with label recipe. Show all posts

Monday, March 21, 2016

I Made it Monday Cream of Chicken (or anything else) Soup

I Made it Monday

Join me on my ongoing quest to share tips, tricks, projects, and recipes along with just about anything else on I Made it Monday.


*This post may contain affiliate links, which means I receive a small percentage if you make a purchase using the link. For my full disclosure statement please click here.

Cream of Chicken (or anything else) Soup

I'm making Chicken Enchiladas for dinner tonight. I'm pretty sure it's my middle daughter's favorite meal. Whenever I am meal planning and ask her what she wants her first response is always Chicken Enchiladas. One of the ingredients for my chicken enchilada recipe is one 10.5 ounce can of cream of chicken soup. I'm not completely against using the canned stuff, but I prefer not to, so this morning I made a batch of "Cream Of" soup to use when I make the enchiladas this evening. 


My "Cream Of" recipe yields about three cans worth so I typically store it in mason jars and freeze the extra until I'm ready to use it.

Cream Of ... Soup

12 Tbsp butter
  1 cup flour
  3 cups milk
  2 tsp chicken base or bouillon (I use Better Than Bouillon Chicken Base. It is available in Beef and Vegetable flavors as well. It is also far less expensive at the grocery store compared to Amazon.)


In a medium sauce pan (preferably a non-stick pan) melt the butter over medium heat.


Add flour and cook 1 1/2 minutes, while whisking continuously. 


If you've ever made home made play-doh, you'll find the flour and butter are a similar consistency when mixed.


Slowly pour milk into butter/flour mixture, while continuously whisking.


Add 2 tsp chicken base or bouillon. This is really a matter of preference but I find that 2 tsp gives me just what I'm looking for, a touch of flavor over the flour and milk, but not too overpowering.

Cook mixture, stirring constantly, until it thickens. This will take a few minutes but once it starts to thicken it happens very quickly.


Canned cream of soup comes in a 10.5 ounce can and most recipes that call for it typically call for a full can. This recipe yields just enough to fill three mason jars just above the 10 ounce mark each, essentially giving you three cans of cream of whatever soup. You can store it in the fridge for up to 7 days, or freeze it until you're ready to thaw and use.

Do you have another staple item that you regularly make instead of buy? Feel free to share the recipe. I'll be sharing some of my tried and tested recipes for seasoning packets soon too.


Be sure to follow me on Pinterest, as well as Facebook, and find my designs at Applique Time. Check back next week to see my next I Made it Monday post. 
Regards,

Bridgette

Monday, March 14, 2016

I Made it Monday Five Cheese Ziti

I Made it Monday

Join me on my ongoing quest to share tips, tricks, projects, and recipes along with just about anything else on I Made it Monday.

*This post may contain affiliate links, which means I receive a small percentage if you make a purchase using the link. For my full disclosure statement please click here.

Five Cheese Baked Ziti

My house is very full this week. Our oldest daughter is home from college for spring break and she brought two friends back to Florida with her. Although it has been a mild winter in the greater DC area I don't know many college kids that would pass at the chance of free room and board for spring break in Florida. So, our house is full, our sink is full, our laundry baskets are full, our beds are full, our refrigerator was full, and I am happy.

This week I'm going to share one of my go to recipes for feeding a crowd, Five Cheese Baked Ziti. I found this recipe while looking for a copy cat of the dish served at Olive Garden.

Below I've posted the recipe as it is written. Of course, being who I am, I do things a little different. First of all, I double the recipe. If I'm not expecting to serve it all at once I make smaller dishes to freeze for later. This recipe takes time and a fair amount of ingredients and clean up, so while it is delicious, there are lots of excuses available for me to not want to make it. To alleviate that, I double it, make three dishes of it, serve one the first night and freeze the other two for later. This is a great dish for a busy school night. Just pop it in the oven, serve it, and wash 1 baking dish. Typically I make one 13x9 dish and two 8x8 dishes. The 13x9 for a crowd, the 8x8's for just our family. When preparing it to freeze, be sure to line your dish with aluminium foil so you can remove your dish after it has frozen and not have dishes tied up in the freezer. You could also use disposable aluminium foil pans if you want to make clean up even easier.

A few other tips ... 

  • I don't use Fontina or Romano cheese very often so I vacuum freeze the extra. 
  • I never measure the Fontina, Parmesan or Romano and choose to just estimate.
  • If I don't have fresh parsley I just use the stuff from the spice cabinet.
  • I have been known to use Penne pasta instead of Ziti if that is what I have on hand.
  • I never have fresh garlic. Never. I always use minced garlic from a jar. 
  • When cooking from frozen I just put the aluminium foil "brick" back in the original dish. If I remember, I put it out to thaw that morning and usually bake it for 30 to 40 minutes at dinner time. I have cooked the dish from frozen before (think frozen lasagna from the freezer section at the grocery store) but it takes a lot longer. I start with 50 minutes then start checking. It will definitely need more time but it's a good starting point.
  • When cooking from frozen I like to tent the aluminium foil so the cheese doesn't stick or get too browned. When it's close to finishing time I will open the foil so the top can brown and crisp some.
  • My favorite part is the topping. I save that part for last.

Please note: This is the standard recipe for a 13x9 dish. It is not doubled. To make a 13x9 and two 8x8 dishes for later dates you will need to double the recipe.

FIVE-CHEESE ZITI 

FOR THE ZITI SAUCE:
4 cups tomato sauce
2 cups Alfredo sauce
1/2 cup ricotta cheese
1/4 cup mozzarella cheese, shredded
3 tablespoons fontina cheese, shredded
1 teaspoon garlic pepper
1/2 teaspoon garlic powder
FOR THE ZITI TOPPING:
3 cups mozzarella cheese, shredded
1/2 cup Italian breadcrumbs
3 tablespoons Romano cheese, grated

3 tablespoons Parmesan cheese, grated
1 tablespoon fresh garlic, chopped
3 tablespoons vegetable oil
3 tablespoons fresh Italian flat-leaf parsley, chopped
REMAINING INGREDIENTS:
1 pound dry ziti pasta
1 cup mozzarella cheese, shredded

PREPARE THE ZITI SAUCE:
Combining all ingredients for the Ziti Sauce in a large bowl; cover and refrigerate until ready to use.

PREPARE THE ZITI TOPPING:
In a medium-size bowl, whisk together the first four ingredients for the Ziti Topping.

Add the garlic, oil, and parsley and mix until thoroughly blended. Cover and refrigerate until ready to use.


WHEN READY TO PREPARE THE WHOLE DISH:
Preheat oven to 375 degrees F. Spray a 13-by-9-inch baking dish or large casserole with non-stick spray.

Prepare the pasta according to package directions.

Pour 1/2 cup of prepared ziti sauce into the prepared dish, and spread it evenly over the bottom using a spoon.

When pasta has finished cooking, drain 


Click here to the water and pour the hot pasta into the bowl of remaining sauce. Mix thoroughly; pour into the baking dish.

Spread 1 cup of shredded mozzarella over the pasta and sauce mixture.

Top the mozzarella with the prepared Ziti Topping, spreading evenly.

Place pan on center oven rack and bake until top is golden brown and cheese is bubbling, about 30 to 40 minutes.

Remove and serve immediately.


These are the ingredients for a double batch. Remember, the recipe above is not doubled. If you want to get the full benefit of having some now and having it ready to go for later you'll need to double the ingredients.

I failed to get a picture after removing it from the oven. It's hard to stay focused with a full house.

Be sure to follow me on Pinterest, as well as Facebook, and find my designs at Applique Time. Check back next week to see my next I Made it Monday post. 
Regards,

Bridgette 

Monday, July 20, 2015

I Made it Monday Bacon Wrapped Hamburgers

I Made it Monday

Two weeks ago I introduced a new plan to kick start my blog and hopefully get me back to posting somewhat regularly. Every week on Monday I will try to post something that I made. This week I'm sharing a favorite summertime grilling recipe. Yes, I know, this has nothing to do with sewing, applique, or even crafting but I said I would post something that I made, and I did make these, and we all eat so why not a great recipe. Plus, there's a neat trick for making almost evenly sized hamburgers and there's nothing wrong with a great recipe and a helpful kitchen trick. If you want to share your IMIM creations please feel free to in the comments or on my Facebook page, https://www.facebook.com/AppliqueTime.


Bacon Wrapped Hamburgers

If you've never checked out allrecipes.com I encourage you to do so. The collection of recipes is wonderful, the search tools are empowering (Don't like an ingredient? Search for recipes without it.) the feedback can often be it's own cooking lesson, and the ability to keep all of my favorite recipes in my own virtual recipe box is fun. 

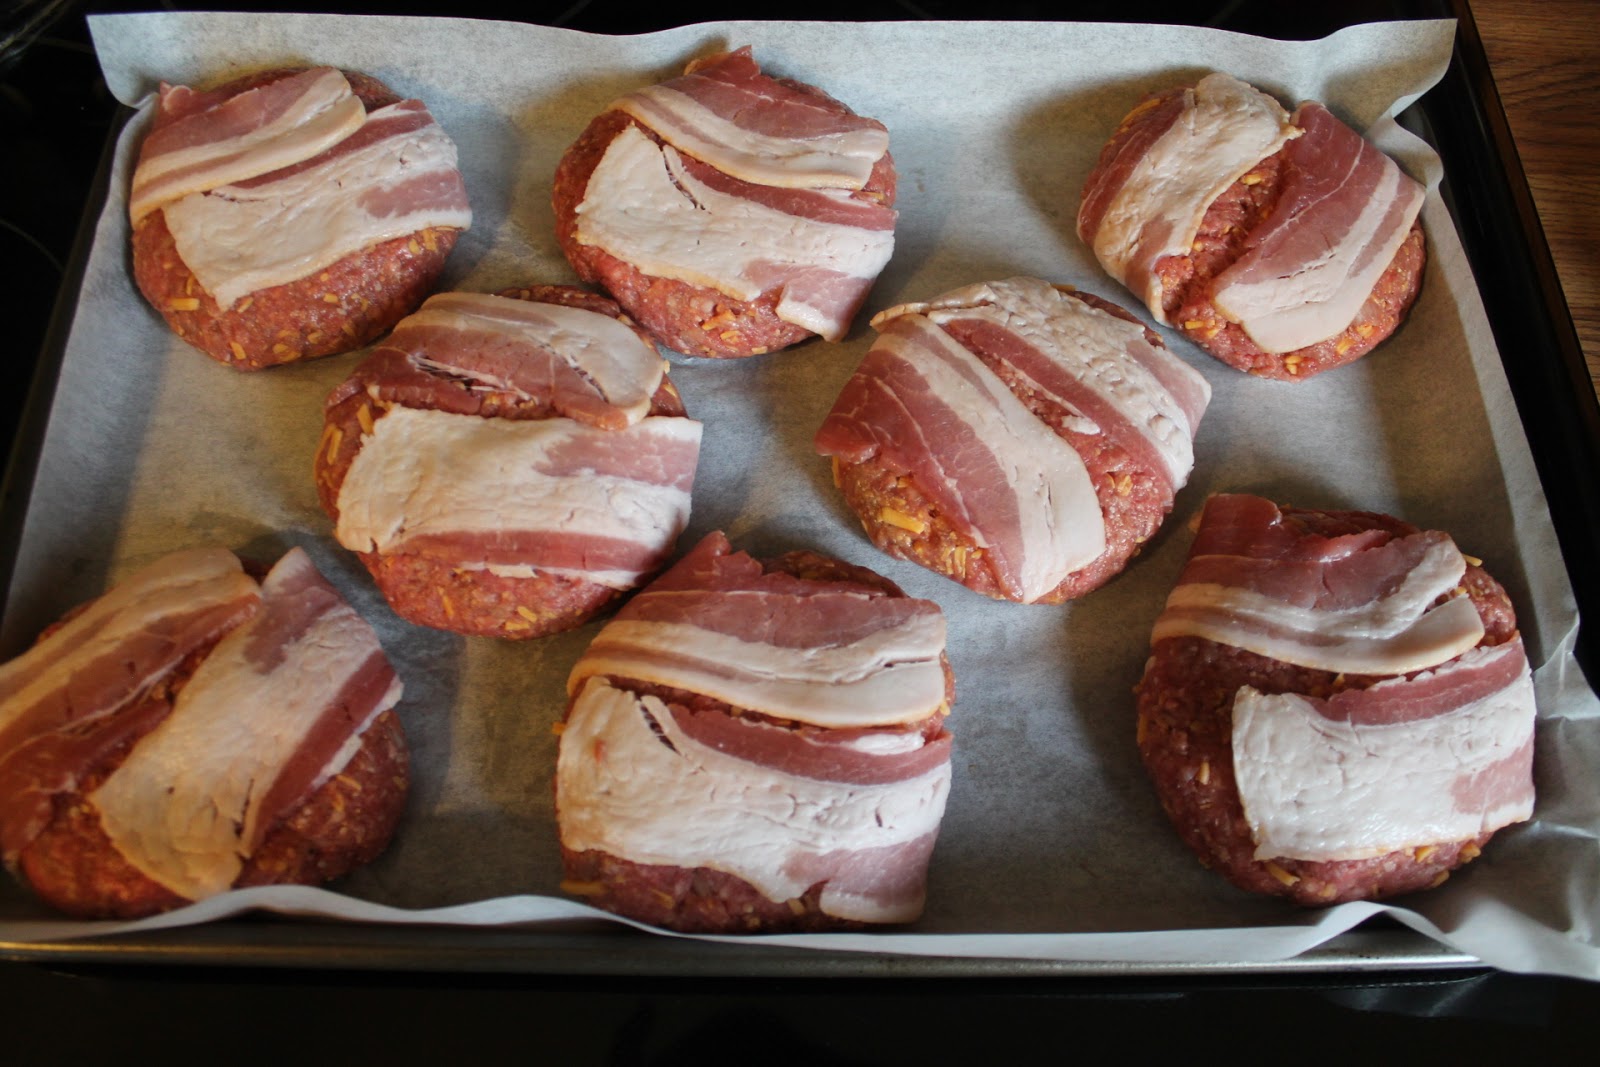
A while ago I stumbled upon a recipe for bacon wrapped hamburgers. Bacon? Hamburgers? All together? Yes, I'll take it! The worcestershire sauce was an unexpected ingredient for me but it adds a great flavor and the bacon and it's juices cook into the burgers which make them extra juicy. I like to use thick cut bacon and make a bunch of these then individually freeze them so we can have them whenever we want. And here's a great trick that I probably saw on pinterest. Instead of having your meat mixed together in a bowl, taking handfuls, balling them up, and flattening them out only to find that you made them too fat and now have to go back and thin them out some and re-ball them and try again or vice versa (tell me it's not just me) lay your meat on a cutting board and form a rectangle as best as possible then score the meat with a knife to create even sections. They won't be perfect but they'll be close enough.


If you're going to freeze the burgers after you wrap the bacon be sure to freeze them individually then you can put them in a freezer bag and pull them out as needed. If I'm not cooking them fresh I usually take them straight from the freezer and cook them on my George Foreman grill.


Give them a try and let me know what you think. If you've got a great hamburger recipe of your own to share feel free to leave a link in the comments.

Happy Monday!

Bridgette