Thursday, August 30, 2012

How I Make a Simple Elastic Waist Skirt with a Scalloped Edge


Have you seen my simple elastic waist skirt tutorial? Ready to try something slightly different? This tutorial will show you how to make a simple skirt with a scalloped edge. Don't worry if you think you're reading the same instructions as my other skirt tutorial. I copied and pasted a lot of it because they are a lot alike.

You will need ...
main fabric, 1 yard or less depending on the size
contrast fabric, 1/2 yard or less depending on the size
measuring tape 
scissors (pinking shears will be helpful too)
rotary cutter and cutting mat (don't worry if you don't have them, it just makes things easier)
thread
7/8 inch elastic although I often use 1/2 inch if that's what I have on hand
iron, sewing machine, you know, the typical stuff if you want to sew
a marking pen or chalk
a compass or something for drawing semi circles (I used my big Pyrex measuring bowl ... really!)

First, you will want to measure the waist of your child and decide what finished length you like. Right now my daughter is 6 years old. She has a 22" waist and I like her skirts to be about 14" long. 

Now, some simple math.

Main Fabric Subtract 1/2" from your desired length. For me that will be 13 1/2" (14 minus 1/2). We will call this your adjusted length.

Cut 2 pieces the width of the waist and the adjusted length. Again for me, that will be 22 x 13 1/2.

If you are working with a waist 20" or smaller just cut one piece on the fold.

Contrast Fabric

Cut 2 pieces the width of the waist x 7" long. This will ultimately yield a contrast band that is approximately 3 inches wide. 

Again, if you are making a skirt for a waist 20" or smaller you can cut 1 piece on the fold.


Now it's time to sew a few straight lines. For all seams the allowance is 3/8". 

Main fabric
With right sides together sew each side seam. I prefer to overcast mine when I am finished since I don't have a serger. If you are working with a smaller waist and previously cut 1 piece on the fold you only have 1 side seam to sew.


Contrast fabric
With right sides together sew each side seam. Do NOT overcast or serge these seams. They will need to lie flat in a few minutes. If you are working with a smaller waist you only have 1 side seam here too.


Press the seams open. Fold and iron the contrast fabric in half, right sides together. This is where we will work on the scallops. 


Now it's time to make a few marks so we can begin to draw the scallops. Using a straight edge and a marking pen or chalk mark a horizontal line along the middle of the band, adjusting the band to extend your mark completely around.


It's time for a little more math but nothing too complicated. I think it's harder for me to explain. Take the width of your original fabric pieces and double it. The width should be the waist measurement which for me was 22 so double that is 44. This is the combined length of the two pieces before seam allowances. Now, subtract 1 1/2 for the seam allowances. That leaves me with 42 1/2. Basically I'm trying to calculate how much "band" I have to divide into scallops. Now divide that number by 10. For me that is 42.5/10=4.25. This means that each of my 10 scallops should be 4 1/4 inches wide. I was very lucky and ended up with an easy measurement. Depending on the width of your waist you may not be. It's okay though. The skirt has a gathered waist so it is forgiving. Your scallops don't have to be perfectly even so do your best and be happy. Now, starting at a seam, measure and mark the width of your scallops along your horizontal line. You should have width marks to allow for 5 scallops on each side.

Mark your scallop width along the horizontal line.
Now that you have your marks you need the scallops. This is where the compass or other round item comes into place. I used my big Pyrex measuring bowl. Hey I said it was an easy pattern, not sophisticated. My bowl had a diameter of just about 4 1/4 inches so it was perfect for me and yes, I was standing in my kitchen with my measuring tape checking bowls and plates for something that was close enough.

Starting at the side seam place your round object between two marks. Be sure that it is almost at the fold of your fabric but not quite and trace the lower half. Repeat this step for each of the 10 scallops adjusting where you need. When you are finished you should have 10 scallops drawn on your fabric, 5 on each side.


See how the scallops come almost to the fold but not quite? That's what you're aiming for.
After you have drawn all of the scallops it's time to stitch them. Simply stitch over the lines that you've drawn being sure to lift your presser foot to turn at each point and really whenever you need to help your fabric around. This isn't a difficult stitch but you do need to be patient to be sure that you are staying on your marks reasonably well and that you're guiding the fabric around. If you try to go to fast you will end up with jagged scallops. Just take your time and work your way around.


Okay, you're getting there. No more math, no more curves to sew, just some trimming and ironing then putting the pieces together.

Now that your scallops are sewn you need to trim the excess fabric away. I prefer to use my pinking shears for this because it helps when it's time to turn the fabric out. Whether you use pinking shears or not be patient and trim reasonably close to the stitches. You'll want to make sure to cut away all of the folded edge at the bottom of your scallops. The points will need a little extra trimming to help them lie flat when they are turned. Be sure to trim away as much as possible on the side seams and cut a small slit as close to the point as possible for each one. After the trimming is done turn the scallops out and start ironing. I use the tip of a child's paint brush to push the fabric out. If you have points that aren't turning well you may need to go back and trim more fabric away. I had a few that I had to go back on and trim more away. 


You're in the home stretch. Now, pin the contrast band to the main band, right sides together, starting with matching the side seams. Sew, serge or overcast.


Next, iron open with the seam up. On the right side, using the seam as a guide, sew along to tack the seam up. If you wanted to add ric rac this is a great place to do so. 


In order to keep a straight line I keep the side of the foot lined up to the seam. 
The only thing left is to create the elastic casing and insert the elastic.

When creating a casing I always like to overcast the raw edge before I start. I don't know why. I'm sure I saw it or read it somewhere. You don't have to. I doubt anything would really happen if you didn't but I do.

Next, I press under approximately 3/8" of the raw edge and then another 1 1/4" to create the casing. Sew close to the lower edge of the casing leaving an opening to insert the elastic.


Using a safety pin (because that's how my mom taught me) I then insert the elastic through the casing. I typically start with my waist measurement plus 1" for the length. Once the elastic is through I pin the elastic ends together (maybe this is why I start with a safety pin) and try the skirt on. Of course the elastic always needs to be adjusted but that is simple. After adjusting the fit I sew the elastic together, distribute the fullness, and stitch the opening close. I also make a habit of stitching in the ditch on the side seams to try to keep the elastic from shifting or twisting.


Guess what's next. Nothing! You're finished. The only thing to do now is make another one now that you have the hang of it.

Truthfully I have rewritten the "scallop" directions at least 5 times. It is so much easier to just show someone than it is to put it in writing. If you have a question or a better way of saying something please feel free to comment. 

For those of you who applique here is a free design. This little bird is one of my very first designs. I actually used some of the same fabric as this skirt to test it more than a year ago. You can find the rest of my designs on my website as well as a 30% off Labor Day sale through 09/03/12. 

Cheers,
Bridgette

Friday, July 6, 2012

Dollar Store Travel Games


There is nothing that can scare a mom quite like the thought of a 2 week, 9 state, 3,000+ miles road trip with 3 kids.  All that time in the car. All those snacks. All of the "are we there yets". What is a mom to do? Get the hot glue gun out of course.

I used games and a puzzle from the dollar store, some magnets, a magnetic dry erase board and a few other items to make 2 games and a puzzle that were worthy of being passed around in a car and brought a little bit of entertainment between several state lines.

It was easy! Here's how I did it ...

I bought a checkers game and snakes and ladders game at the dollar store along with a 48 piece puzzle. 


Using magnets that I already had (you can find them at Michaels) I hot glued round magnets to the bottom of all of the game pieces. I used a magnet roll (also available at Michaels) and put strips on the back of the game boards making sure not to cover the creases where the board folds for storage. I also used the magnet roll to cut small pieces to put on the backs of all of the puzzle pieces. I did try to keep the magnets as close to the middle as possible for the puzzle pieces. 


Fortunately for me I already had a magnetic dry erase board that was the perfect size. If you don't have one in the house you can pick one up at Wal-Mart or Target for around $6. 

If you've read my blog before you won't be surprised to know that I kept each game and its pieces in a ziploc bag. Talk about a space saver. 


Since I didn't want the dice for snakes and ladders rolling all over the place in the car I put them in a clear plastic bowl with a lid. I used a recycled bowl from a yogurt treat but you can use anything as long as it's clear on the top or bottom so you can see the dice. I also used two dice instead of one. Sometimes snakes and ladders can go on endlessly. With two dice it seems to go a little faster. I prefer to play 2 or 3 short games rather than 1 endless game.


Of course we had other forms of entertainment for the car as well as for our many destinations. I'm not a big "movie in the car" mom so that wasn't one of them. We did have lots of books including early reader books for our 6 year old. I'm happy to say that she reached a new milestone in her reading ability and began reading silently to herself. Hooray for summer reading! We also had packs of pipe cleaners that I picked up from the dollar store, stickers and paper, a new coloring book and box of crayons for each girl, fun pads, cheap cookie sheets for each girl to use as a writing tray (they're great because things can't roll off), a really neat travel memory game from Amazon and many other things. I didn't put it all out at one time but rather offered something new when needed. 

The games have definitely become a staple in the car for trips or anywhere we have to sit and wait. Since I feel guilty every time I hand over my smart phone for our 6 year old to play games on I'm thinking magnetic tic tac toe would be great also especially when we are at a basketball or soccer game or even a track meet.

If you're planning a road trip I hope this comes in handy. It definitely helped us pass the miles. Do you have a different travel game idea? Something that worked great for your family? If so please share with the rest of us in the comments section.

Blessings,
Bridgette

Thursday, April 26, 2012

What Kind of Sewing Machine Do You Recommend?


What kind of sewing machine do you recommend? I get this question, or some form of it, at least once a week and I always give the same answer so I decided it was probably time to just put it on the blog for everyone to see and others to weigh in.


Of course there are many things to consider when purchasing a sewing machine, price and function being the top two. After you have decided how much you have to spend you need to know what you want your machine to do. Will you only be sewing? Are you hoping to do some machine appliqueing or embroidering? What about quilting? Maybe you already know exactly what you want, and even if you don't, now is a good time to visit your local sewing machine repair facility. This may be a sewing machine/vacuum repair shop or it may be at your favorite fabric store but it is always where I suggest people start and typically end their search for their machine. Here's why ...


First of all, I always, always, always suggest you buy something that can be repaired locally. Whether you're a sewing amateur making a few things for the kids now and then or a professional quilter making family heirlooms we all love our machines and I promise, you're not going to be happy when something breaks to begin with. If your machine has to be sent "away" for repair (wherever that is) you're going to be even more disappointed. In addition, typically when you buy from a local shop they offer a warranty for repair and chances are you will already know exactly who will be doing the service for you.


Second, check for trade ins. Many repair shops not only fix machines but they also sell new machines and chances are if they have new machines they have used trade-ins. This is a great way to get "more" machine for your budget. The used machines have been serviced, typically have warranties and often have bundles that can include accessories, hoops and even software at a discounted price. Find a shop that will let you trade in your trade in and you've struck gold.


Third, many repair shops offer ongoing support classes and even if they don't have formal classes they are almost always willing to sit down and show you how to do things. Let's face it, sewing machines have evolved like all other technology and they can be intimidating. Knowing that you have someone you can turn to for help is well worth it.


Whatever you do please don't be fooled by deep discounts at chain stores or celebrity endorsements. Support is the key and you won't get any from a national chain or a celebrity.  


Does all this mean that the only place to buy a machine is at a repair shop? No, of course not. Check estate sales and craigslist. Ask at the fabric shop if anyone is selling one. If you don't need the support you might find what you're looking for at a national chain store.  


Whatever you do ask lots of questions and be clear to those helping you about what you intend to use it for so they can guide you along the way.


Did I miss something? Do you have a tip, a lesson learned? Please feel free to share.   


Blessings,
Bridgette


Friday, March 30, 2012

How I Make a Simple Elastic Waist Skirt


Typically when I applique a shirt for my daughter she has a matching skirt. I don't really think twice about it, I just make a skirt. Last time I made her one it got me thinking, maybe you (my loyal reader) would like to know how I "just make a skirt". Well, it's easy, I promise. One simple math problem and straight lines. Nothing else. Really!  


You will need ...


main fabric, 1 yard or less depending on the size
contrast fabric, 1/2 yard or less depending on the size
measuring tape 
scissors 
rotary cutter and cutting mat (don't worry if you don't have them, it just makes things easier)
thread
7/8 inch elastic although I often use 1/2 inch if that's what I have on hand
iron, sewing machine, you know, the typical stuff if you want to sew


First, you will want to measure the waist of your child and decide what finished length you like. Right now my daughter is 5 years old. She has a 22" waist and I like her skirts to be about 14" long. She is tall and very lean (a trait that I gave up years ago) and I am fairly conservative when it comes to her skirt length. She is a little girl after all.


Now, some simple math.


Main fabric
Subtract 1/2" from your desired length. For me that will be 13 1/2" (14 minus 1/2). We will call this your adjusted length.


Cut 2 pieces the width of the waist and the adjusted length. Again for me, that will be 22 x 13 1/2.


If you are making a skirt for a waist 20" or smaller just cut 1 piece on the fold. 


Contrast fabric
Cut 2 pieces the width of the waist x 5 3/4" long. This will ultimately yield a contrast band that is approximately 2 1/2 inches wide. 


Again, if you are making a skirt for a waist 20" or smaller you can cut 1 piece on the fold.


That's it for the cutting and the math. Now it's time to sew a few straight lines. For all seams the allowance is 3/8". 


Main fabric
With right sides together sew each side seam. I prefer to overcast mine when I am finished since I don't have a serger. If you are working with a smaller waist and cut 1 piece on the fold you only have 1 side seam to sew.


Contrast fabric
With right sides together sew each side seam. Do NOT overcast or serge these seams. They will need to lie flat in a few minutes. If you are working with a smaller waist you only have 1 side seam here too.


Press the seams open. Fold and iron the contrast fabric in half, right sides out, to create the contrast band. This is why we didn't serge or overcast the seams on the contrast, they are now tucked away neatly within the band.


Now, pin the contrast band to the main band, right sides together starting with matching the side seams. Sew, serge or overcast. 


If you are using a directional fabric for the contrast band be sure to check and make sure it is going to be facing the right direction after you sew it. If you don't you might end up with upside down snowmen and yes, that was the voice of experience you just heard.  


Next, iron open with the inseam up. On the right side, using the seam as a guide, sew along to tack the inseam up. If you wanted to add ric rac this is a great place to do so. 


The only thing left is to create the elastic casing and insert the elastic. I told you this was simple.


When creating a casing I always like to overcast the raw edge before I start. I don't know why. I'm sure I saw it or read it somewhere. You don't have to. I doubt anything would really happen if you didn't but I do.


Next, I press under approximately 3/8" of the raw edge and then another 1 1/4" to create the casing. Sew close to the lower edge of the casing leaving an opening to insert the elastic. 


Using a safety pin (because that's how my mom taught me) I then insert the elastic through the casing. I typically start with my waist measurement plus 1" for the length. Once the elastic is through I pin the elastic ends together (maybe this is why I start with a safety pin) and try the skirt on. Of course the elastic always needs to be adjusted but that is simple. After adjusting the fit I sew the elastic together, distribute the fullness, and stitch the opening close. I also make a habit of stitching in the ditch on the side seams to try to keep the elastic from shifting or twisting.


That's it! You're done. Now go make a skirt!


For those of you who applique here is a free design for you. I created this a week or so ago and didn't get it tested until now. Hopefully you are inspired to use it on something recycled.


Cheers,
Bridgette 

Saturday, March 3, 2012

May the Force be with You (especially if you want to make a R2D2 cake)


17! My oldest daughter is 17! Can you believe it? I guess it's not hard if you don't know her but I'm telling you she was just 5, I promise.


Since she is 17 and I am admittedly starting to stress about her leaving home soon I really wanted to have a party. Not an all out over the top party but at least something with a little bit of a theme and some recognition that it was her big day. The problem with that was what kind of party do you have for a 17 year old? I really had no idea so I turned to pinterest looking for some easy ideas and happened upon some Star Wars themed ideas. The beauty in that is her and her closest friends spent several long nights earlier this school year watching all of the movies. The series continues to come up whenever they are together so what better theme than Star Wars. Now, what to do? I was originally looking for easy ideas and I did find a few but the big one was the cake. It wasn't difficult but let me tell you, I have got some serious hours invested in that thing.


I looked at many R2D2 cakes online and finally settled on this one. There was only one obstacle ... it was a little too big for us. Since we weren't planning a big party I had to find a way to scale it down. And this dear friends is the purpose of this post ... a smaller R2D2 cake!


I used 3 box cake mixes and made 2 9x13 sheet cakes and 1 6 inch round. The rest of the batter was used to make cupcakes that I froze for a later date otherwise known as "whenever I want a cupcake day".


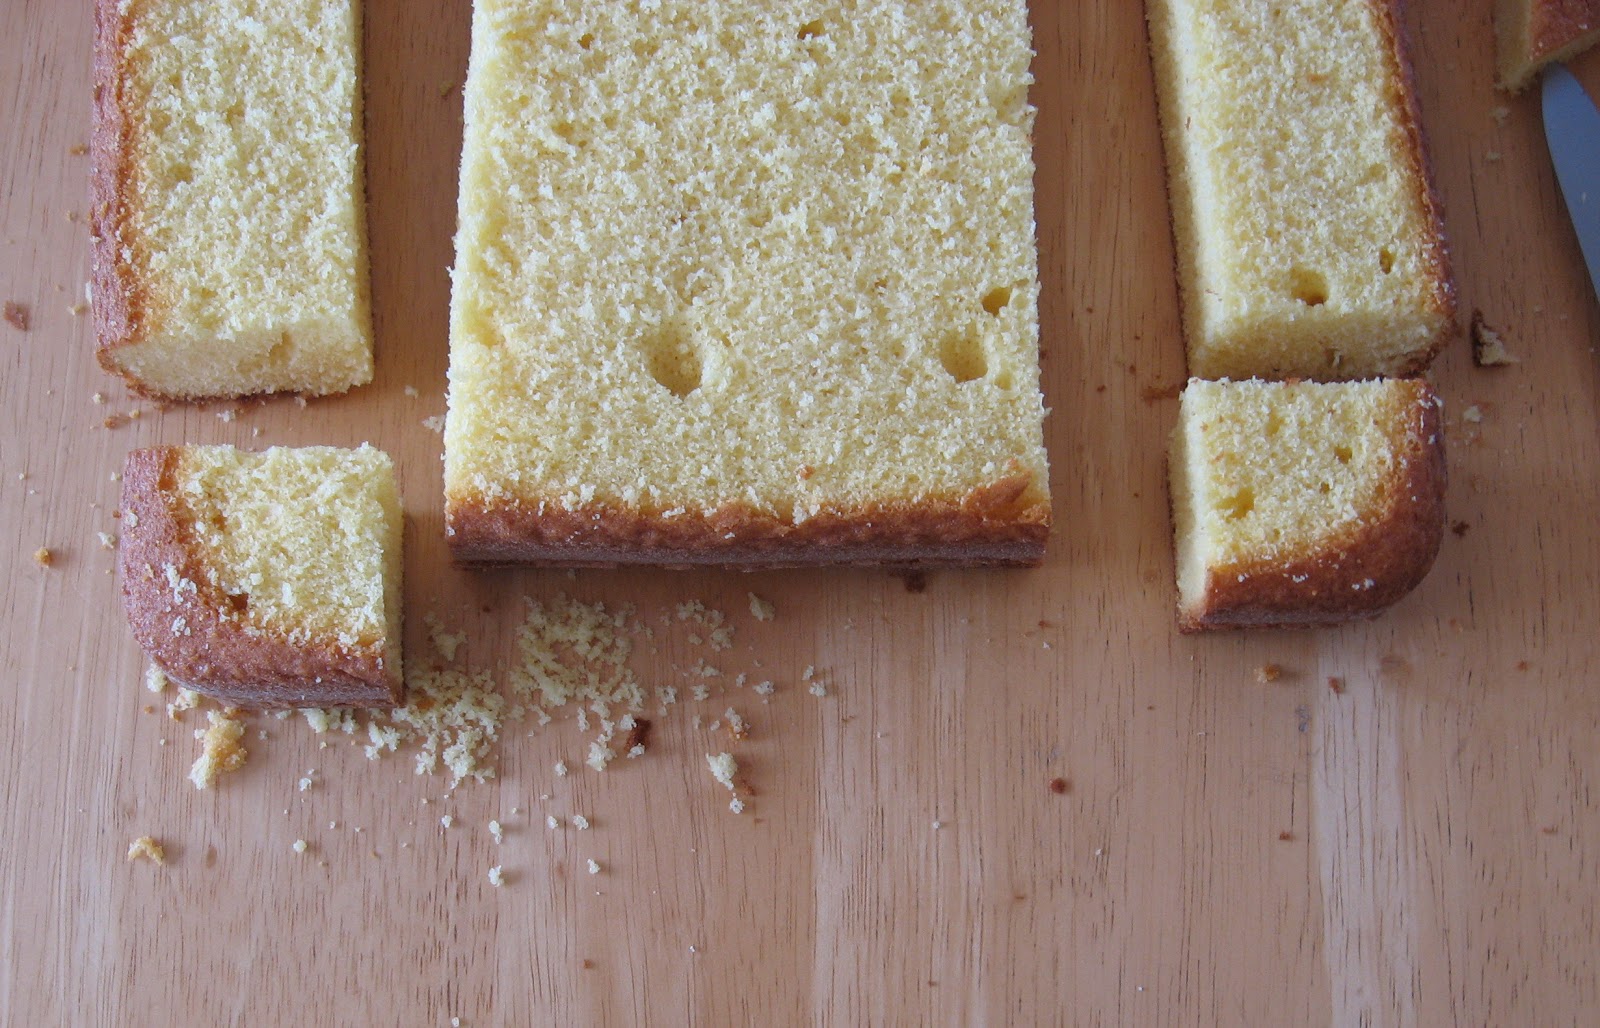
I leveled the tops of each of the prepared cakes using my handy cake leveler and saved the crown of the 6 inch round. I cut 1 of the 9x13 sheets in half so that I had 2 9x6.5 rectangles and stacked those on top of one another. Then I cut the 6 inch round in half and stacked it up. The semi circles became the head of R2D2 and the stacked rectangles became the main body. I cut the crown of the 6 inch round in half and stacked it for the lower body section and then shaped it to be angular. This was great because it wasn't quite as high as the body and created a bit of depth. If you don't have a high enough crown to work with it's okay. There is enough left from the second 9x13 to make the lower body as well.  


After this I still had a 9x13 sheet left to work with. I cut the longs sides and used those to make the arms and feet. The entire center section of this sheet was not used. If you don't have a crown to work with for the lower body section you can use this remaining section to create it. For the arms and feet I placed the cut sides beside my torso section and then cut the bottom 2 inches or so on each one. I turned the cut sections up so they were taller than the arms and now looked like feet. 


After this I was finished for the day. Since this was a surprise there was a lot of evidence that I had to take care of before track practice was over so the entire cake went in my carrier and into the deep freezer. 

The next day I made 2 batches of Indy Deb's icing. Who is Indy Deb? I have no idea. This is a recipe that is everywhere on the internet that I found last summer while looking for a recipe that could handle high temps and high humidity. It is wonderful to work with for decorating and freezes really well. 

1 1/3 cups crisco
1/3 to 1/2 cup milk
3T powdered dream whip
2 to 3T clear vanilla
2lbs sifted powdered sugar

Using a stand mixer mix crisco, milk, dream whip and vanilla then slowly add powdered sugar. I start with 1/3 cup milk and use 2T of vanilla. I tried it with more vanilla once because I really like vanilla but it was a little too much for me. Once it is mixed I add a splash or two of milk and mix a little more until it is super smooth. 

When it was time to decorate I put a thin layer of icing on to lock in any crumbs then used a toothpick to mark where the different elements of R2 would go. After that I used a Wilton #17 star tip and started piping stars on. All total I spent about 5 hours decorating the cake including mixing my icing colors and clean up. You don't have to do it all at once so don't worry if you don't have 5 hours to devote. Just do what you can then put it back in the freezer until you can work on it more. If you have any icing left (you should) freeze it in a bowl with a tight lid and save it for the next cake you make. 

Even though it wasn't the easy idea I was looking for I was very proud of the cake and she loved it. Besides, your oldest daughter only turns 17 once.